Hey there! It's been crazy busy around my house, but since I caught a break and got put on call at work I decided to play a little catch up! Last week on the 31st was the last day of school for my kiddos. It was very bittersweet. The kids were excited because that meant the start of summer and playtime of course! The bad part was they knew it was probably the last time they were going to see their teachers and friends. The school they attended was a small country school, one of 9 in our town. The school board decided several months ago in their latest round of budget cuts to close down 2 of our elementary schools :( Now, we moved 2 1/2 years ago and actually moved out of the school district for that particular elementary school. My husband and I chose to keep our kids in that school, driving them to and from school everyday since they couldn't ride the bus, because we LOVED that school so dang much! They had an amazing bunch of teachers and staff, who truly cared for the students. Also, my 8 year old son has Asperger's, a form of autism, and doesn't do well with a change in his routine. He's very high functioning and is in regular classes, but his teachers and aids have above and beyond what was required of them to help him succeed. I've heard horror stories from other parents who have children with kids on the autism spectrum in dealing with the school system, and while I'm sure that these stories are the exception rather than the rule, I saw no reason to take my son out of an environment where he was truly flourishing. Anyhow, in the subsequent redistricting of the remaining schools in our system, the majority of the kids who attended our school (Highland Heights), and most of the teachers, were all lucky enough to be sent to the same school (Crestdale). When we moved 2 1/2 years ago, we moved into the Westview district. I could have requested a change to Crestdale, but there was no guarantee that we would be granted our request, and it would have had to been submitted before we knew that most of the teachers were going there as well. My husband and I decided that since they were going to have to change schools anyway, we might as well just go to the school who's district we already lived in, and try to make the transition smooth as possible. A bonus was the kids can now ride the bus again, which they love to do (and it will save us plenty in gas. . . . choosing to drive them to HH everyday for the last 2+ years was an extra hour driving per day!).
OK, now that THAT long back story is told, we can get down to our crafting project! The kids and I love to make gifts for their teachers, even more so this year. So this is what we created together. My daughters created a magnet board for their teachers, something they could either hang on their wall or have it leaning of their desks. I bought from scrapbooksteals.com a kit that had wooden boards, magnetic sheets, and a photo frame. The kit can be seen
here . We took the two 5" x 8" boards and my 7 year old 1st grader painted hers with red acrylic paint, and my 5 year old kindergartner painted hers with black acrylic paint. They painted the back and the sides. A little got on the front, but that didn't matter, and you'll see why later. Here is the front of one and the back of the other.
Next, we cut out a piece of school themed paper for the front. The paper measured 4 7/8" x 7 7/8". This was placed on the front of the boards with spray adhesive. Mod Podge also would've worked great. After that, I took the magnetic boards and centered them on the front. The magnetic boards have two strips of strong adhesive on the back of them, but to be on the safe side I added a couple more strips of my own using red tape.
Using my Cricut Expression and the cartridge Rock Princess, I cut out the letters of the teachers' names. I also cut out an apple for each board using the Preserves cartridge. After the girls helped me glue everything on we Mod Podged them for extra durability. For awhile I wasn't sure that was a good idea. . . . the Mod Podge didn't disappear on the magnetic boards like it does on paper and pics. However, once it was good and dry, it flaked off easily with very little effort, and I'm glad we added it to make it last longer without the letters peeling.
That's it! Cute little note boards for the teachers. I added a couple little magnets to hold their notes and the girls wrote their names on the back. The teacher's really enjoyed them!


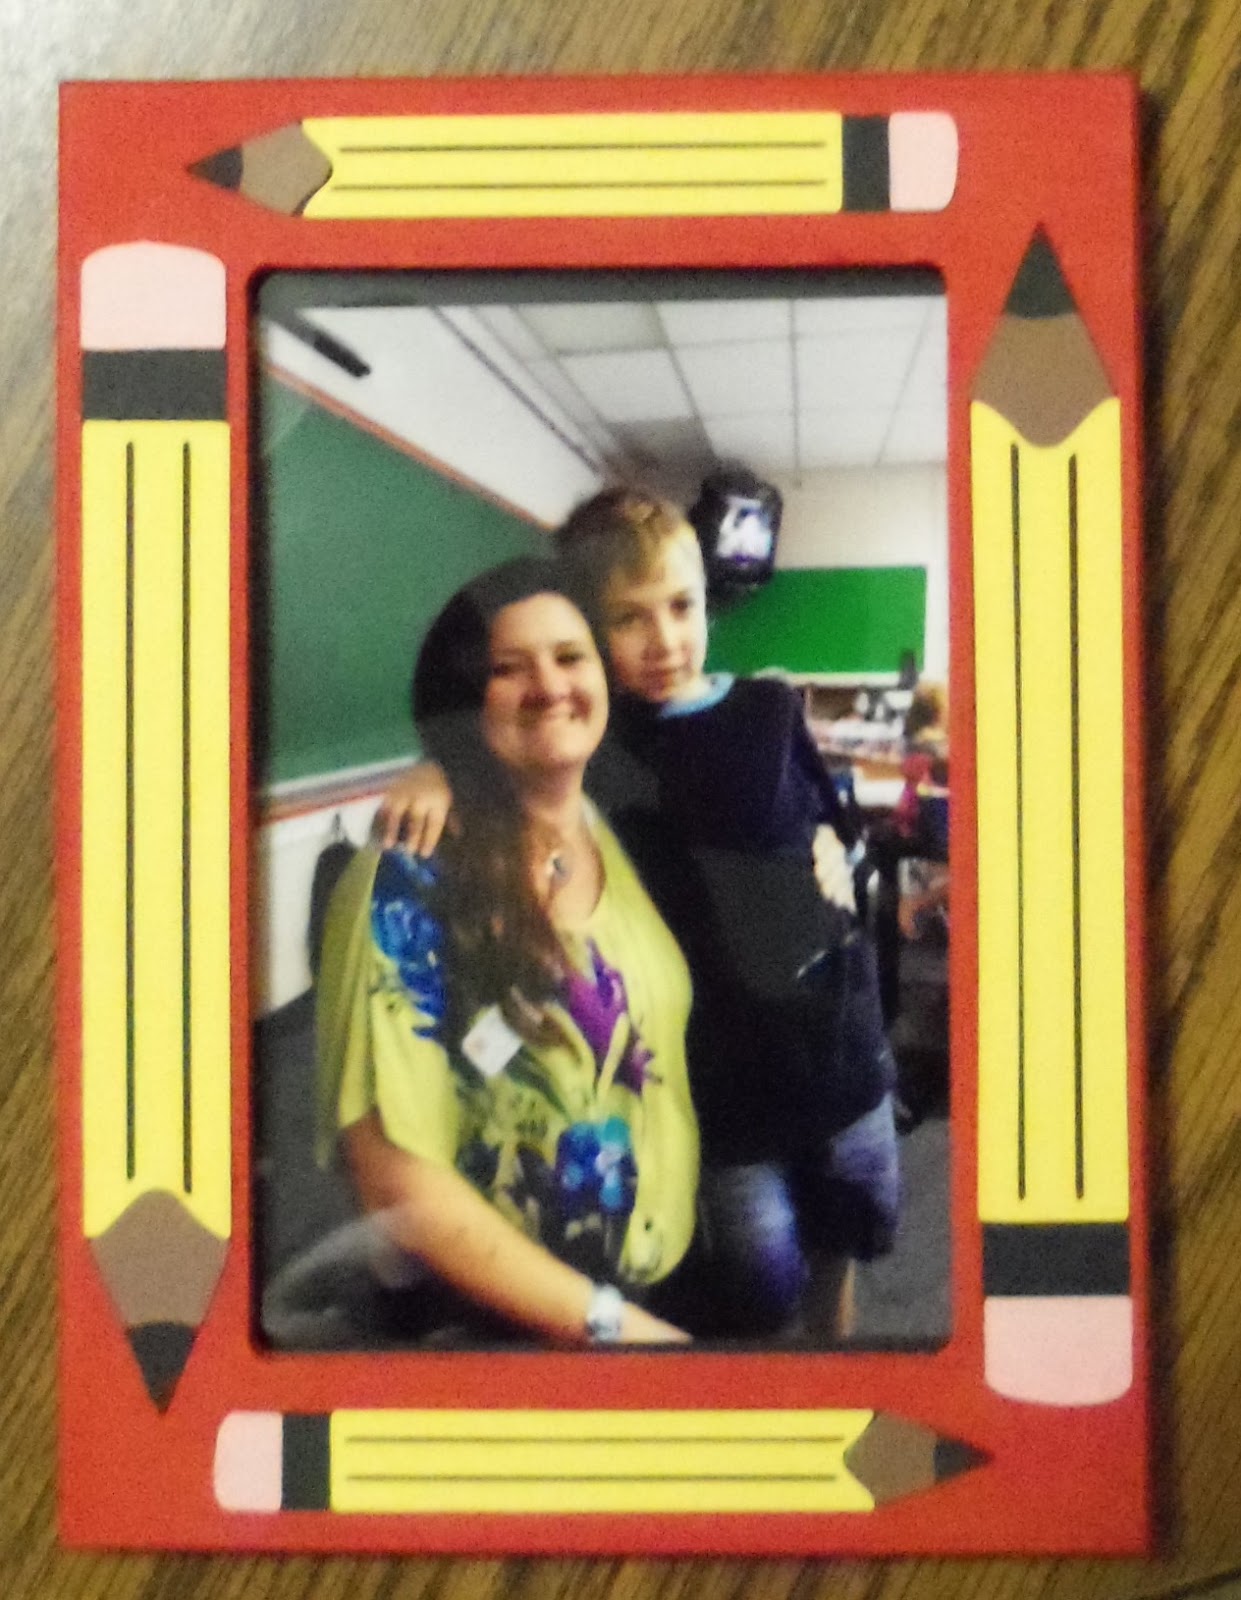
My son and I put together the photo frame for his teacher. This woman has been amazing beyond words with helping him with whatever difficulties he came across and finding a way to deal with things in a way that worked for him. (Side note: at this school they "flex"; meaning the teachers will teach a certain grade, and the next year they'll move with the kids to the next grade, so pretty much the entire class, teacher included, is together for two years. Then the next year the teacher will return to the previous grade for a new group of kids. My son only had this teacher for one year, for 2nd grade. He would've had her for 3rd grade if they hadn't closed the school. In that one year she did so many things for him that I could talk about it for hours [and I think I've rambled enough for one post, what do you think?!?!] What I wanted to say though is that for Kindergarten and 1st grade he had Mrs. Fields, the lady pictured above with my Kindergartner. This lady also is AMAZING, and one of the sweetest, most patient, and wonderful teachers I've ever known! And above her with my 1st grade is Mrs Benner, who was my other daughter's teacher for Kindergarten and 1st grade. Again, such an amazing person and teacher . . . . you can see why we kept the kids going here and are heart broken that they're closing!!)
OK, back to the photo frame LOL! My son painted the frame itself red, and the frame holder black, again with acrylic paint.
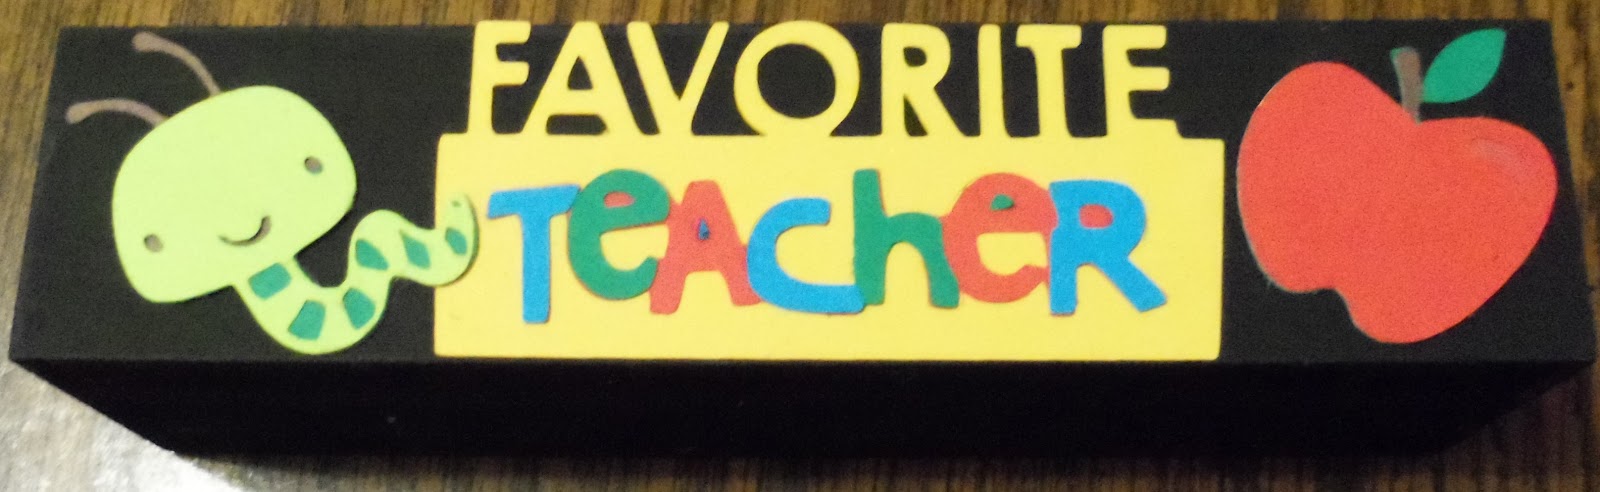
While they were drying, my son looked through the Cricut Lite Recess cartridge and picked out his favorite images. He picked three for the front of the picture frame holder, and three for the back. (All of the images he picked were from the Recess cart, except for one; he wanted a worm to match the apple, so we got the worm from Create a Critter). Here is the front:
And here is the back!
Then, again using the Recess cart, he wanted to have pencils going all around the photo frame. So that's exactly what we did!!
Here is what is looks like all together:

We weren't quite finished though. We couldn't forget about the aides. These wonderful ladies have been with my son from the very beginning when he was in Kindergarten. They have been instrumental in getting his IEP in order, and in coming into his classroom to help him during assignments to stay focused on his work, instead of what everyone else in the classroom was doing. I don't know what we're going to do without them! We took two of the 2.5" x 2.5" wooden squares that are included in the kit for creating custom magnets, and he painted them black. He insisted they needed some sparkle, so we used Zing! extra fine glitter on one and Zing! chunky glitter on another , both in cotton candy. I just used my Zig two way glue pen on the edges and my son poured the glitter all over. We Mod Podged our pics on, put another layer of Mod Podge over the top of everything, then glued a magnet to the back with Zip Dry glue. My son said they could put the magnets on their fridge at home or on their desks/filing cabinets at school, "So they won't forget me!" But I'm pretty sure if you ask these lovely ladies they'll tell you they could never forget him.

WHEW!! I know that was a long post, and thank you for sticking through me through this one. Most of them won't be nearly this long (I hope!) . There was a back story to this project that I felt needed to be told, Anyhow, I hope that you've enjoyed seeing these teacher projects, and maybe I've given you a few ideas for next year!!
Until next time . . . .
STAY INSPIRED!!